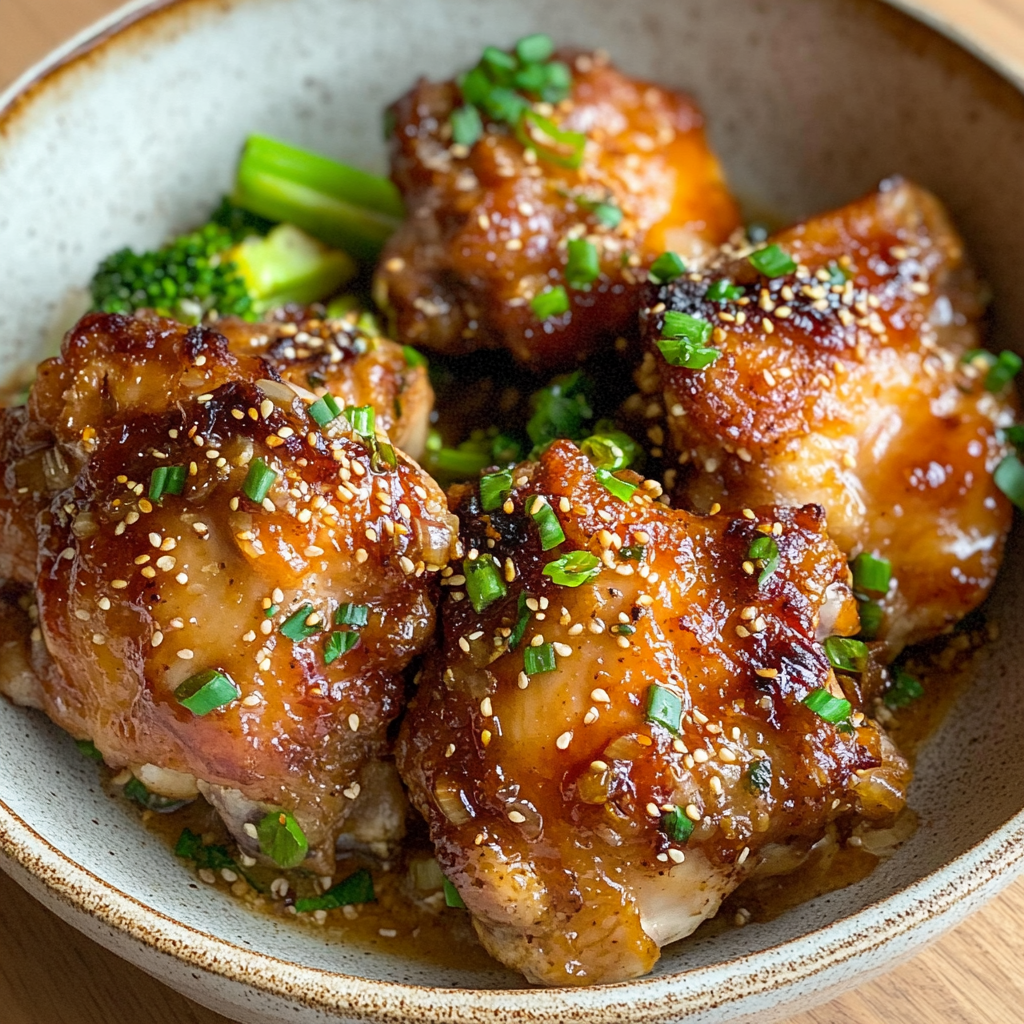
Easy Soy Garlic Chicken Thighs become a family favorite when you need to feed a crowd without losing your sanity. There’s something deeply satisfying about the marriage of smoky soy sauce and golden garlic glaze, especially when paired with a perfectly crisp chicken crust. What I love most about this recipe is how it transforms basic ingredients into restaurant-quality magic—just one pan and 30 minutes to go from groceries to golden-brown perfection.
When my child developed a sudden obsession with soy-glazed food last winter, we had to get creative. This recipe was born from the cozy kitchen of my grandmother’s home, where I first learned to let flavors develop slowly and intentionally. The balance of sweet, savory, and heat in these chicken thighs feels like comfort on a plate—a warm embrace after a long day. Whether you’re a home cook with just 30 minutes or a seasoned chef wanting to simplify, this dish will become your new go-to.
What are Easy Soy Garlic Chicken Thighs?
Imagine taking boneless chicken thighs and coating them with a light breading of potato starch, then searing until golden before drenching them in a glossy, umami-rich sauce. These chicken thighs derive their magic from a blend of dark soy sauce, tangy rice vinegar, and honey, which creates a balance of sweet and savory that sticks to every bite. The gentle heat from red chili flakes adds depth without overwhelming, making it perfect for both adventurous and cautious palates.
This dish is rooted in Asian-inspired fast food traditions—like Chinese soy-garlic wings or Korean bulgogi—but simplified for home kitchens. The sauce’s glossy finish and nutty aroma come from a careful simmering process that thickens the cornstarch mixture. Potato starch gives the chicken a delicate crunch that doesn’t get soggy, unlike flour-based coatings. It’s the kind of dish that can work just as well as a weekend project or a weeknight rescue meal.
Reasons to Try Easy Soy Garlic Chicken Thighs
These chicken thighs work their way into my rotation for two simple reasons. First, they require minimal prep: no marinating, no complicated tools, just a few pantry staples and 30 minutes. The crispy coating and sticky-sweet sauce make them craveable, while the protein-packed thighs keep everyone full. Second, their versatility is unmatched—you can eat them with rice, toss them over noodles, or serve them cold as a salad addition.
Beginners will appreciate the clear step-by-step instructions that eliminate guesswork. For busy parents, the make-ahead nature of the sauce and breading (both can be prepped in advance) means you can assemble with one hand while managing homework help with the other. I’ve served this dish for dinner parties, picnic lunches, and even as a post-school snack, and it’s never failed to bring smiles. The combination of crispy and juicy textures creates a sensory experience that’s hard to resist.
Ingredients Needed to Make Easy Soy Garlic Chicken Thighs
1 lb boneless, skinless chicken thighs (about 4-6 pieces)
3 tbsp potato starch (gives light crunch)
3 tbsp all-purpose flour (optional but adds structure)
1 tsp garlic powder (fresh garlic also works)
½ tsp salt (adjust to taste)
½ tsp black pepper (freshly ground recommended)
3 tbsp neutral oil (vegetable or canola recommended)
8 cloves garlic, minced (about 2 tbsp)
2 green onions, separated into white/green parts
1 tsp red chili flakes (adjust if making milder)
Sauce ingredients:
½ cup chicken stock (or substitute with water + bouillon)
3 tbsp honey (adjust for tang)
1 tbsp rice vinegar (adds balance)
1 tbsp dark soy sauce (for depth)
1 tsp cornstarch (to thicken)
Garnish:
Green onion tops, minced
White sesame seeds (toasted for extra nuttiness)
Instructions to Make Easy Soy Garlic Chicken Thighs – Step by Step
Step 1: Start by preparing your sauce. In a glass bowl, whisk together the chicken stock, honey, rice vinegar, and soy sauce. Add the cornstarch, mixing until completely dissolved—this prevents clumps during cooking. Set it aside while you work with the chicken.
Step 2: Pat the chicken thighs completely dry with paper towels. This step is crucial for achieving that golden crust. In a large bowl, combine the potato starch, flour, garlic powder, salt, and pepper. Gently dip each chicken piece into the mixture, coating both sides evenly but not heavily. The goal is a thin, even layer that crisps but doesn’t absorb too much oil later.
Step 3: Heat the neutral oil in a large skillet over medium-high heat. The pan needs to glow faintly when ready. Lay the chicken pieces in a single layer, being careful not to crowd the pan—crowding reduces crust development. Sear for 6–8 minutes per side until both are golden brown. This takes patience, but it’s worth it for the deep-fried aroma. Transfer the chicken to a plate and set aside.
Step 4: In the same pan, add the minced garlic and white parts of the green onions. Cook for 3 minutes until fragrant and lightly golden, stirring often. You’ll smell the garlic browning, which adds a roasted richness. Add the red chili flakes now, sautéing just for a minute to bloom the heat.
Step 5: Pour the prepared sauce into the pan and bring to a gentle simmer. Let it cook for 3 minutes until thickened—you should see the sauce reduce and coat the back of a spoon. Gently return the chicken thighs to the pan along with any juices. Baste them in the sauce for 3–4 minutes until the chicken is fully cooked and the flavors meld. The thighs should register at least 165°F on a thermometer.
Step 6: Transfer to a serving platter. Sprinkle with minced green onions and sesame seeds for a final flourish. Serve warm with steamed rice or a quick vegetable side. The chicken is juicier the sooner you eat it while the crust is still crisp.
Chef’s Tips for a Perfect Result
- Dry the chicken thoroughly: Even a small amount of moisture prevents the breading from sticking.
- Don’t skip the rice vinegar: It balances the sweetness in the sauce better than plain sugar.
- Use fresh garlic if possible: Minced garlic straight from the tube tends to turn bitter.
- Adjust heat gradually: If the breading browns too fast, lower the heat slightly to avoid burning.
- Make double the sauce: The sweet soy glaze keeps well in the fridge for up to a week.
Variations and Substitutions
Gluten-Free Option
Replace all-purpose flour with more potato starch (total 6 tbsp) and use tamari instead of soy sauce. This keeps the coating crispy and avoids cross-contamination risks.
Vegetarian Version
Swap chicken thighs with marinated portobello mushrooms or tofu steaks. For tofu, press for 30 minutes for best results and adjust cooking time to 8-10 minutes per side.
One-Pan Makeover
Add broccoli florets or snap peas to the pan during sauté for a complete meal. They’ll absorb the sauce beautifully in the last 5 minutes of cooking.
Quick Weeknight Swap
Air fry the chicken thighs at 400°F for 15 minutes, flipping once. This avoids oil but still creates a crunchy crust. Just keep an eye during the last few minutes to prevent burning.
Extra Crunchy Option
Double the potato starch and refrigerate the breaded chicken for 30 minutes before frying. The cold temperature promotes a deeper golden color and crispier texture.
How to Serve and Pair
These chicken thighs are best served with rice, but don’t let tradition limit you! Try them over sushi rice tossed with edamame and sesame seeds, or as a starring role in a noodle salad. For a more substantial dish, serve with sautéed bok choy or stir-fried cabbage to use up leftover sauce.
Presentation matters. Transfer to a dark ceramic platter to emphasize the glossy sauce, and drizzle extra glaze on the sides for drama. Serve with a simple miso soup or kimchi on the side for a full meal experience.
For parties, these make excellent skewers. Thread the chicken on bamboo sticks with pickled daikon rounds and serve at room temperature. Kids love them as mini bites—just cut into 1-inch pieces and serve with small rice balls.
Storage and Reheating
Refrigerator
Cool completely before storing in an airtight container for up to 3 days. The sauce may thicken slightly after refrigeration; reheat with a splash of water or broth to loosen.
Freezer
Freeze uncooked batter-coated chicken in a single layer on parchment paper, then bag and freeze for up to 1 month. Reheat straight in the pan or oven without thawing.
Room Temperature
Leftover chicken can last up to 2 hours in an oven-safe dish. Avoid leaving it out longer, especially in warm environments.
Reheating
Best results: Preheat oven to 350°F, place chicken on a baking sheet, and cover with foil. Heat for 15-20 minutes. For crisper crusts, remove foil for the last 5 minutes. Avoid microwaves—they make the breading soggy.
Nutritional Values
- Calories: 450 per serving
- Protein: 40g
- Carbohydrates: 30g
- Fat: 22g
- Fiber: 2.5g
*Approximate values. Varies based on portion size and specific brands.
Frequently Asked Questions
Can I use panko instead of potato starch?
Yes, but the texture will be denser. For best results, mix half panko and half potato starch to maintain lightness while ensuring it holds up in the sauce.
How do I know when the chicken is done?
Use an instant-read thermometer—it should register 165°F in the thickest part. The flesh should be opaque with no pink and juices should run clear.
My breading keeps falling off. What did I do wrong?
Three common reasons: damp chicken (always dry thoroughly), cooking the chicken too early (wait until the oil is fully heated), or moving the chicken too soon after adding to the pan.
Can I prepare the sauce in advance?
Absolutely. Store in an airtight container in the fridge for up to 3 days. Bring to room temperature and thin with extra water or broth if needed before using.
What sides pair best with this dish?
Steamed jasmine rice, pickled radishes, or a simple green salad with sesame oil dressing. For extra flair, try soba noodles tossed with shredded cabbage and ginger.
Conclusion
Easy Soy Garlic Chicken Thighs marry convenience with flavor in a way that feels like home cooking at its best. With each bite, the crispy crust gives way to juicy meat, followed by the comforting sweetness of honey and depth of soy sauce. As you gather this simple combination of ingredients, remember they carry the same warmth I felt as a child learning to cook in my grandmother’s kitchen—where ordinary ingredients create extraordinary memories.
Give this recipe a try when you crave effortless comfort food. Whether you’re feeding a family or having a solo dinner with a good book, these chicken thighs will remind you why cooking should always feel like a joy, not a chore. The glossy finish and aromatic scent are the perfect conversation starters, inviting everyone to the table for a meal that’s equal parts satisfying and soulful.
Print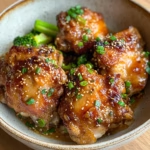
Easy Soy Garlic Chicken Thighs for a Flavorful Weeknight Dinner
- Prep Time: 10
- Cook Time: 30
- Total Time: 40
- Yield: 4 to 6 servings 1x
- Category: dinner
- Method: Oven Baking
- Cuisine: Asian-Inspired
Description
Crispy, golden chicken thighs bathed in a glossy soy-honey glaze, ready in 30 minutes. A sweet and savory pan-seared dish with a nutty finish, perfect for weeknight meals or family meals.
Ingredients
4 boneless, skinless chicken thighs
1/4 cup potato starch
2 tbsp sesame oil or cooking oil
3 cloves garlic, minced
2 tbsp dark soy sauce
2 tbsp honey
1 tbsp rice vinegar
1 tsp red chili flakes
1 tbsp cornstarch mixed with 2 tbsp water (slurry)
thyme or green onions, for garnish (optional)
Instructions
Preheat oven to 400°F (200°C)
Pat chicken thighs dry and season with salt and pepper
Dredge thighs evenly in potato starch, shaking off excess
Heat oil in an oven-safe skillet over medium-high heat
Sear chicken for 3-4 minutes per side until golden, transfer to oven-safe dish
In same skillet, add garlic, soy sauce, honey, vinegar, and chili flakes. Simmer 3-4 minutes
Stir in cornstarch slurry until sauce thickens and glossy, 1-2 minutes
Return chicken to skillet, spoon sauce over thighs
Bake 10-12 minutes until sauce is bubbly and golden
Notes
Sauce and breading can be prepared in advance
Use rice vinegar for acidity or substitute with lemon juice
Add chopped cilantro or sesame seeds for extra flavor
Store leftovers in air-tight container up to 3 days
Nutrition
- Serving Size: 1 chicken thigh with 2 tbsp sauce
- Calories: 380
- Sugar: 15g
- Sodium: 8500mg
- Fat: 18g
- Saturated Fat: 4g
- Carbohydrates: 12g
- Fiber: 1g
- Protein: 35g
- Cholesterol: 120mg