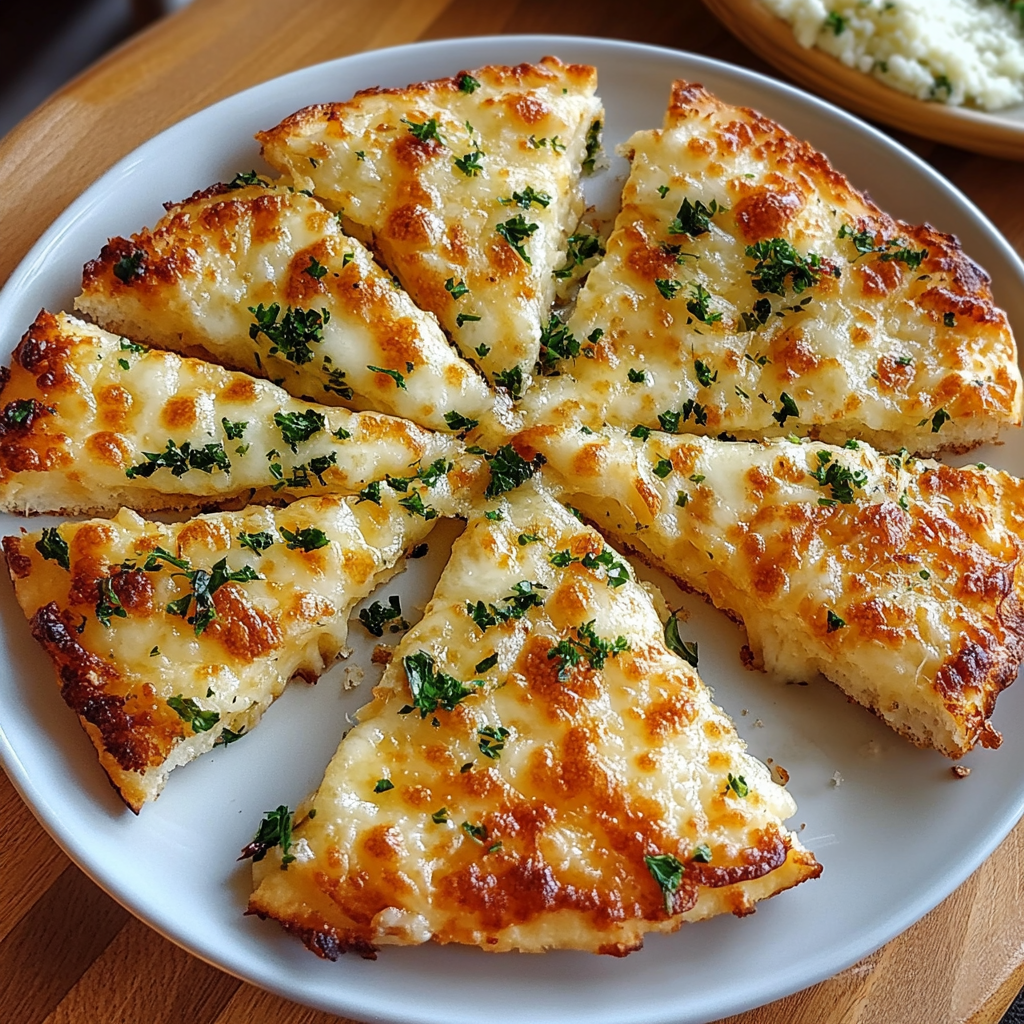
What is Air Fryer Cheesy Tortilla Garlic Bread?
Imagine golden-brown tortillas cradling a molten pool of mozzarella, fragrant with garlic, and golden on the edges. That’s air fryer tortilla garlic bread—America’s beloved snack reimagined for busy kitchens and small countertops. This version swaps heavy oven baking for the precision of an air fryer, giving you ultracrisp tortillas with a golden top and stretchy cheese center in under 10 minutes. Rooted in the same tradition as classic garlic bread, it uses simple tortillas instead of rolls, making it faster to make and fresher to eat. The real magic lies in the air fryer’s heated air, which crisps the outer layers while locking in that gooey, buttery warmth at the core.
Reasons to Try Air Fryer Cheesy Tortilla Garlic Bread
Life moves fast, right? This recipe is for the home cooks who want to feel like they’ve made something indulgent—even when dinner needs to be on the table in 10 minutes. No waiting for ovens to preheat, no dirtying a full baking sheet. Just a gentle spread of butter on two tortillas, a blanket of cheese, and a quick air fryer session. The result? A deeply flavorful snack that rivals bakery versions but with 90% less cleanup. Perfect for weekday lunchboxes, soccer game snacks, or that peaceful Sunday morning when you just want something warm to sip morning tea alongside. It’s also beginner-friendly—no knife skills needed to slice the cheese-pull wedges or mess to clean up.
What You’ll Need
Tortillas – 2 flour tortillas (8 to 10 inches), at room temperature for easier spreading
Butter – 2 tablespoons softened (room temperature butter spreads evenly without tearing the tortilla)
Cheese – 1 cup shredded mozzarella (coarsely grated for gooeyness, not pre-shredded)
Garlic powder – 1 teaspoon (use fresh garlic if you dare, but powder has bold staying power)
Italian seasoning – 1 teaspoon (equal parts basil, oregano, and thyme for a balanced herbal note)
Instructions – Step by Step
Step 1: Set Your Staging Area
Start by flouring your countertop and air fryer basket. This prevents butter from sticking during preheating. Place your tortillas flat on a clean surface while you assemble the seasonings. Garlic powder and Italian seasoning (I keep mine in tiny jars like a tea cabinet) should be measured into a bowl. If you have fresh chives or rosemary, this is a great time to mince a half-inch of them into the mix—the air fryer doesn’t heat high enough to burn delicate herbs.
Step 2: Create the Butter Blanket
Spoon the softened butter onto a spoon and let it slide across one tortilla, coating from edge to edge. This isn’t just about flavor—it’s about achieving that perfect golden crust. The butter prevents the cheese from clinging and creates a divider between the tortilla and your fingers when you slice it later. I use a rubber spatula to spread, but a knife works in a pinch. If the tortilla gets too warm to handle, let it rest on the counter while you work on the second one.
Step 3: Layer with Confidence
The seasonings scatter evenly, first a light sprinkle of garlic powder (you can go bold here if your eyes well up at the thought of store-bought breads), then a firm dusting of Italian seasoning. Next, spread the mozzarella as if you’re making a grilled cheese. Avoid pressing it in—let the cheese hold itself up before you sandwich it closed. Then flip the second tortilla buttered-side up and press gently to make a flat, sturdy rectangle. A quick test: tap the top tortilla gently. If you hear a hollow sound, the layers are properly sealed (no loose cheese or butter spillage).
Step 4: Air Fry with Focus
Place the sandwich in the air fryer basket, tucking it into any corners if your basket is small. Set the timer to 4 minutes. By minute 3, the edges might start to curl—this is good. At 4 minutes, the top should glisten with a touch of golden oil, and pressing the center gently should give it a soft, squishy rise. If you love crispiness, add 10 more seconds. If you prefer softer cheese, stop at 4 minutes flat.
Step 5: Rest, Slice, and Serve
Transfer the sandwich to a cutting board. Let it sit for 90 seconds—this is the cheese’s recovery time, letting gluten set and creating that perfect cheese string. Use a pizza cutter for neat, playful slices (my toddler loves helping with this step). Arrange on a warm plate or directly in a serving container—the cheese will keep its stretch even when sliced early.
Chef’s Expert Tips
- Butter at room temperature spreads like silk, avoiding butter “lumps” that cool the air fryer basket and lengthen cooking times.
- Use coarsely grated cheese—foil-wrapped supermarket shreds tend to become rubbery. Grate it yourself for a balanced melt and soft texture.
- A little pressure goes a long way. Press the sandwich gently if your tortillas are delicate. Aggressive pressing can tear the mozzarella blanket.
- Preheat the air fryer to 350°F (180°C), but skip lowering the basket gently if your unit struggles to heat evenly. Set the basket on the tray instead to maintain consistent heat zones.
- Wrap in parchment paper if using low-fat tortillas—this prevents them from drying out as the air fryer circulates hot air.
Taste Test Variations
Cheese Swap: Try pepper jack for spice or fontina for a nutty richness. Just ensure the melting point is compatible with the air fryer’s heat.
Vegetarian Twist: Add spinach to the cheese layer before assembling. Fresh, frozen, or drained canned spinach all work—the heat from the cheese wilts it instantly.
Tube Mix Hack: Use pre-sliced garlic bread in a plastic bag! Rock it with our mixture of butter and Italian seasoning for a chaotic, fun air fryer experiment.
Gluten-Free: Use corn tortillas instead of flour. Brush with cornstarch slurry (1 teaspoon cornstarch + 2 tablespoons water) for extra crispiness from the inside out.
How to Serve and Pair
Serve warm with a ramekin of marinara for dipping. It’s perfect with a tall glass of whole milk (my grandmother’s secret, and you won’t get nightmares from it either). For a festive touch, scatter fleur de sel and smoked paprika on individual slices before serving. Try it as appetizers by slicing wedges and putting them in olive jars with toothpick handles. Leftovers are great at room temperature—slice it on day two and eat it like corsage bread with tea.
Storage and Reheating
Refrigerator
Wrap in aluminum foil or an airtight container for up to 2 days. The tortillas stay crisp in foil but soften slightly in plastic.
Freezer
Stack between parchment paper and freeze for 1 month. Reheat directly from frozen for best results—don’t let them thaw for more than an hour.
Room Temperature
Leave the whole thing wrapped on the counter for up to 6 hours in a cool kitchen. Avoid sunlit windows—tortillas lose their charm after 30 minutes in direct heat.
Reheating
For a revived crunch, reheat at 300°F (150°C) for 3 minutes in the air fryer. If you have a toaster oven, quick fried after 5 minutes on the grilling rack works well. Avoid the microwave unless you want a cheese spreadsheet—microwaves leave no room for stretchy strings at all.
Nutritional Values (Per Serving)
- Calories: 300 kcal
- Protein: 12 g
- Carbohydrates: 30 g
- Fat: 18 g
- Fiber: 2 g
Approximate values.
FAQs
Can I use olive oil instead of butter for a vegan option?
Yes—substitute olive oil for butter, but watch the cooking times more carefully. Olive oil browns faster, and the paper-like tortilla layer (instead of a roll) can burn in the air fryer.
How do I tell when it’s done? The top looks the same color my wall is!
The tortilla will crisp at the edges, and the cheese will appear glistening and sagitte. A gentle tap on the bottom will sound hollow—the top is still slightly soft, but the cheese is fully melted inside.
My cheese melted and spilled out during cooking. Help!
Use thicker, coarser-grated cheese next time. For oddly runny melts, blot excess moisture using a paper towel before assembling the sandwich. Flip the sandwich in the basket halfway if it tilts unevenly.
Can I prepare the garlic bread the night before and reheat it in the morning?
Absolutely! Chill the cheese-filled sandwich wrapped in parchment and paper towel before freezing. Alternatively, freeze uncooked and air fry in batches for a quick breakfast.
What’s the best way to customize it for different meals?
Try adding sautéed mushrooms in the cheese layer, or drizzle honey and cinnamon over it post-air frying for a twist on sweet and savory. Cheese lovers, try a triple layer!
Conclusion
Air Fryer Cheesy Tortilla Garlic Bread is a small miracle of modern kitchen convenience—kind to your time, kinder to your leftovers, and endlessly customizable. Whether it’s a toy for the toddler or a snack-to-soup sidekick, this recipe adds buttery, garlicky warmth to any meal. Let that molten cheese string remind you how simple joy can be, one gooey bite at a time.
Print
Air Fryer Cheesy Tortilla Garlic Bread
- Prep Time: 5
- Cook Time: 4
- Total Time: 9
- Yield: 2 1x
- Category: dinner
- Method: Air Frying
- Cuisine: American
- Diet: Vegetarian
Description
Golden, ultracrisp flour tortillas filled with melty mozzarella, garlic, and herbs. Ready in under 10 minutes with minimal cleanup, this handheld snack is perfect for quick meals or snacking.
Ingredients
2 flour tortillas (8 to 10 inches)
2 tablespoons softened butter
1 cup shredded mozzarella (coarsely grated)
1 teaspoon garlic powder
1 teaspoon Italian seasoning (basil, oregano, thyme)
Instructions
Flour your countertop and air fryer basket to prevent sticking. Place tortillas on a clean surface.
Combine garlic powder and Italian seasoning in a bowl. Add fresh chives or rosemary if using.
Spread softened butter evenly on one tortilla. Sprinkle mozzarella cheese over the butter. Top with the seasoning blend.
Fold the second tortilla over the filled side, creating a pocket. Press the edges to seal.
Preheat air fryer to 375°F for 3 minutes. Place the folded tortilla in the basket. Air fry for 4 minutes, flip, and cook 2 minutes more until golden and crispy.
Let cool for 1 minute before slicing and serving.
Notes
Use flour tortillas instead of corn to avoid tearing when spreading butter.
Freeze uncooked filled tortillas for later use (cook directly from frozen, adding 1-2 minutes to total time).
Add shredded Parmesan (vegetarian) for extra flavor if available.
Nutrition
- Serving Size: 1 tortilla bread
- Calories: 300
- Sodium: 450mg
- Fat: 18g
- Saturated Fat: 10g
- Carbohydrates: 22g
- Fiber: 1g
- Protein: 10g
- Cholesterol: 45mg